A step-by-step guide on how to build a shed base
DIY work can be difficult, but it doesn’t have to be. Atlas Sheds are here to turn that around.
A secure shed base is key to a stable shed. No matter what type of garden shed you’re installing, they must all be fitted properly to ensure longevity and durability.
Stick around if you want to avoid water damage, flimsy fittings, and rotting.
Relevant materials and equipment
Tools:
- Spade or shovel: For digging and levelling the ground.
- Wheelbarrow: For mixing concrete and transferring materials.
- Tape measure: For accurate measurements.
- Hammer or mallet: For securing wooden pegs and for other tasks.
- Concrete mixer: Saves time when mixing concrete and ensures consistency.
- Trowel or float: Smoothing and levelling the concrete.
- Rake: Spreading and levelling gravel or aggregates.
- Utility knife: For cutting the weed-proof membrane.
- Saw: Needed for cutting Timber.
To ensure safety when building your shed base, wear safety goggles to avoid any dust and particles getting in your eyes, gloves to protect your hands from the materials, and steel-toed boots to avoid any accidents.
Materials:
- Cement: Used for a concrete base.
- Lumber or timber: For creating a frame for the concrete or timber bearers.
- Sharp sand: For making the concrete mix.
- Ballast: Used to make cement.
- Wooden pegs or stakes: Levelling and marking out the area.
- Reinforcing mesh or rebar: Additional strength for a concrete base.
- String line: Accurate marking of the base area.
- Spirit level: Levelling the base perfectly.
Step 1: Planning
Before you begin, plan out the best area in your garden to place your shed. You need to factor in the size and style of the shed and the ease of maintenance work for the chosen location. For the shed base, consider a level surface to build on and a suitable base material.
Thorough planning is crucial to efficient construction. If you’re installing a summer house, you must factor in the position that will get the most sunlight. A cosy outhouse made from metal may be best placed under a covered area, such as a large tree, to avoid rotting from excess rain.
Ensure that you have planning permission for your shed to avoid any obstacles in the future, and consult with a professional to understand the building regulations in the UK. However, provided your shed is under 15 meters, and you aren’t planning on designing sleeping accommodation, you shouldn’t need building regulations consent.
Step 2: Prepare the area
Opt for level ground, such as flat concrete, and remove any trees, plants, or rocks that may grow around your shed or affect its stability.
Choose a spot that isn’t prone to flooding, and ensure efficient access to your shed entrance. If you want to install a shed with two entrances on each side of the building, it wouldn’t be smart to build it against a wall.
Use a tape measure to measure the space you will need for the fitting and level the ground using wooden pegs or stakes to mark the space and a spirit level for accuracy. If you need to create a smooth surface, use a shovel to dig up the ground and flatten the surface. Measure the diagonals to ensure the area is square; the diagonals should be equal.
If you are working with a slope, dig a shallow trench on the higher side and build up the lower side with gravel or soil. Add weed killer to the ground if you wish to prevent weeds from growing in or around your shed. This is beneficial if you use gravel or slabs for the base.
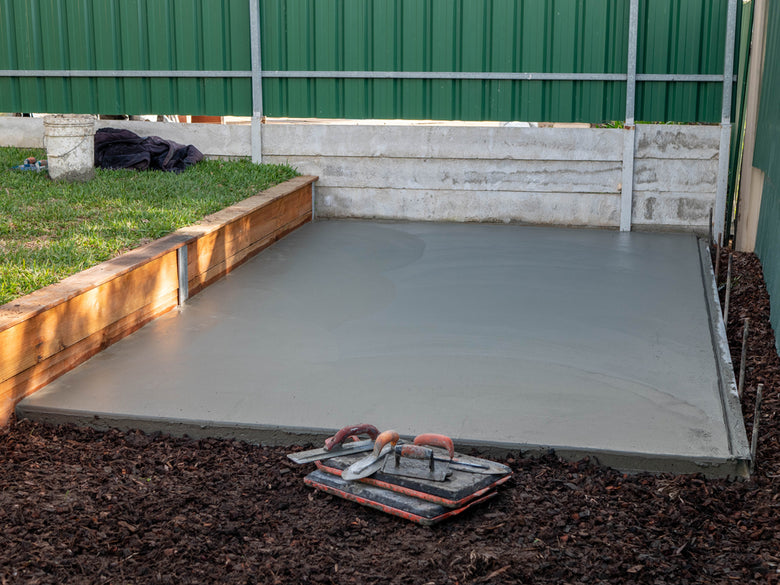
A concrete base
- Build a wooden frame: Measure your timber and cut it to fit the size of your marked areas. Secure the corners of the frame using screws or nails and place it on the prepared ground. Then use your pegs to secure the frame in its place.
- Add reinforcement (optional): Cut and add a piece of reinforcing mesh to your frame to prevent the cement from cracking.
- Mix the concrete: Combine cement, sharp sand, and ballast in a concrete mixer. Add water gradually to the mix and continue mixing until you achieve a thick consistency.
- Pour the concrete: Pour the concrete into the mixture and use a shovel to spread it evenly. Using a hammer, tap the frame's sides to remove any air bubbles, then use a trowel to smoothen the surface.
- Cure the concrete: To retain the moisture, cover it with plastic sheeting and allow it to cure for at least 7 days to reach maximum strength.
- Remove the frame and check the levelling: After the concrete has cured, remove the pegs or stakes and dismantle the frame. Using a spirit level, check the levelling of the shed to ensure it's stable before building your shed.
A paving slab base
- Create the sub-base: Apply and spread a layer of sharp sand or crushed stone 5-10cm deep in the marked area and compact the materials using a tamper. Then level the area using a spirit level.
- Lay the paving slabs: Starting at the corner of the area, use a rubber mallet to lay and secure the slab into place, leaving a 1-2cm gap between each to allow for jointing. Ensure you use a spirit level to level each one, removing any sub-base material to ensure a flat surface.
- Joint the slabs: Mix a mortar of 4 parts of sand and 1 part of cement and add water to create a thick and consistent base. Then use a trowel to spread the mortar into the gaps between the slabs and smooth the mix using the back of the trowel. Use a brush to remove any excess mortar.
- Allow the base to settle and check for level: Leave the base to settle for 24 hours, then use a spirit level to check the ground is flat enough to build on.
A timber base
- Create a sub-base (optional): Spread a layer of gravel or crushed stone 5-10 cm deep within the marked area and compact it using a tamper. Use a spirit level to level the base.
- Measure and cut the timber: Cut your timber bearers to the measurements of your shed base to ensure correct fittings. Use a saw to cut the timber, ensuring they are straight.
- Lay the timber bearers: Lay the first timber bearer at the corner of the area. Space each bearer 40-60cm apart, laying them perpendicular to the direction of the floor joists. You can use a rubber mallet to adjust any bearers if necessary.
- Level the bearers: Use a spirit level to add or remove any gravel or crushed stone from the sub-base if needed for flat levelling.
- Secure the bearers (optional) and check for level: You can secure them by driving wooden stakes into the ground on either side and screwing them to the bearers. Alternatively, you can use metal brackets or anchors.